
A well-installed fence not only enhances your property’s security and privacy but also adds to its aesthetic appeal. Whether you’re installing a wooden, vinyl, or metal fence, getting it right the first time will save you time, money, and effort. Here’s everything you need to know about fence installation.
1. Choosing the Right Fence for Your Needs
Before installation, decide on the best type of fence for your property. Some common options include:
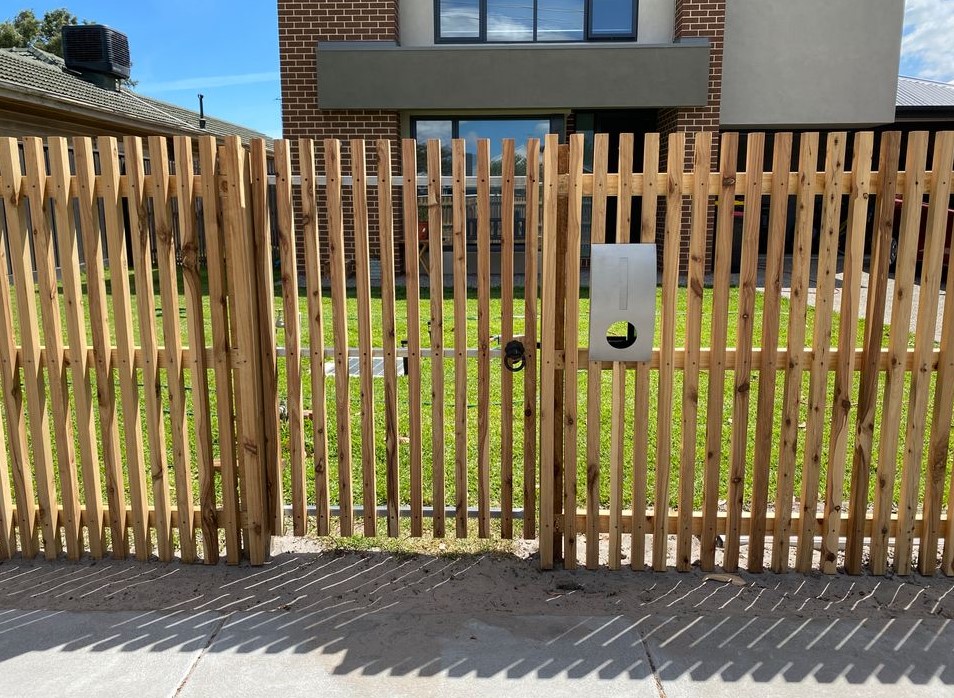
- Wooden Fences – Classic, durable, and customizable. Ideal for privacy and aesthetics.
- Vinyl Fences – Low-maintenance and weather-resistant, perfect for a clean, modern look.
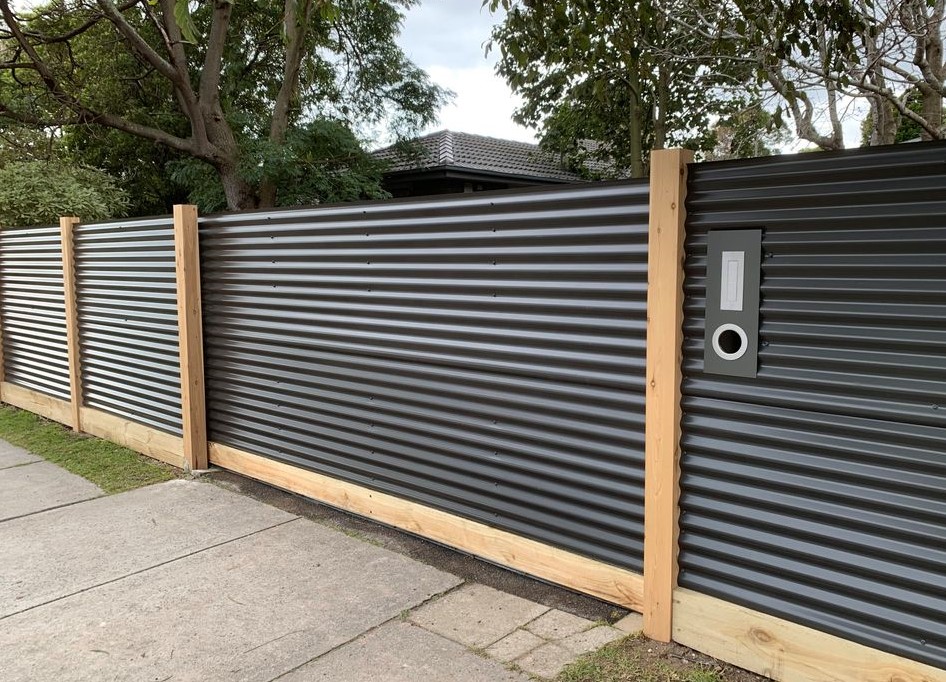
- Metal Fences (Aluminum, Wrought Iron, Chain Link) – Great for security and durability.
2. Planning and Permits
- Check local zoning laws and HOA regulations regarding fence height, materials, and placement.
- Call 811 before digging to locate underground utilities.
- Get necessary permits to avoid legal issues later.
3. Gathering the Right Tools and Materials
For a smooth installation, you’ll need:
✔ Fence panels or pickets
✔ Posts (wood, metal, or vinyl)
✔ Concrete mix for stability
✔ Post hole digger
✔ Level and measuring tape
✔ Screws, nails, and brackets
4. Step-by-Step Fence Installation
Step 1: Mark Your Fence Line
Use stakes and string to outline where your fence will go. Ensure the layout is straight and evenly spaced.
Step 2: Dig Post Holes
- Dig holes about 2-3 feet deep (or below the frost line in colder regions).
- The standard spacing for fence posts is 6-8 feet apart, depending on the material.
Step 3: Secure the Posts
- Set each post in concrete for stability.
- Use a level to make sure posts are straight before the concrete dries.
- Allow 24-48 hours for concrete to cure before proceeding.
Step 4: Attach Fence Panels or Rails
- For wooden fences, attach rails to posts first, then nail or screw in pickets.
- Vinyl and metal fences usually come in panels that attach to posts with brackets.
Step 5: Add Finishing Touches
- Paint or stain wooden fences for added protection.
- Install gates and hardware as needed.
- Check for gaps or uneven sections and make final adjustments.
5. Fence Maintenance Tips
- Wood: Seal or stain every 2-3 years to prevent rotting.
- Vinyl: Clean with soap and water to keep it looking fresh.
- Metal: Inspect for rust and repaint if necessary.
Final Thoughts
A properly installed fence enhances your home’s curb appeal, security, and privacy. Whether you’re a DIY enthusiast or hiring a professional, following these steps will ensure a strong and lasting fence.

137 thoughts on “The Ultimate Guide to Fence Installation: Tips for a Strong & Secure Fence”
https://vitz.ru/forums/index.php?autocom=gallery&req=si&img=4808
Awesome https://is.gd/tpjNyL
Good https://is.gd/tpjNyL
Good https://is.gd/tpjNyL
Good https://shorturl.at/2breu
Good https://shorturl.at/2breu
Good https://shorturl.at/2breu
Awesome https://lc.cx/xjXBQT
Very good https://lc.cx/xjXBQT
Very good https://lc.cx/xjXBQT
Good https://lc.cx/xjXBQT
Good https://lc.cx/xjXBQT
Very good https://lc.cx/xjXBQT
Awesome https://t.ly/tndaA
Very good https://t.ly/tndaA
Very good https://t.ly/tndaA
Very good https://urlr.me/zH3wE5
Very good https://rb.gy/4gq2o4
Very good https://is.gd/N1ikS2
Awesome https://is.gd/N1ikS2
Very good https://is.gd/N1ikS2
Good https://is.gd/N1ikS2
Awesome https://is.gd/N1ikS2
Awesome https://is.gd/N1ikS2
Very good https://is.gd/N1ikS2
Good https://is.gd/N1ikS2
Good https://is.gd/N1ikS2
Very good https://is.gd/N1ikS2
Awesome https://is.gd/N1ikS2
Good https://is.gd/N1ikS2
Good https://is.gd/N1ikS2
Awesome https://is.gd/N1ikS2
Good https://is.gd/N1ikS2
Good https://is.gd/N1ikS2
Awesome https://is.gd/N1ikS2
Good https://is.gd/N1ikS2
Very good https://shorturl.fm/bODKa
Very good https://shorturl.fm/TbTre
Top https://shorturl.fm/YvSxU
Cool partnership https://shorturl.fm/a0B2m
Good partner program https://shorturl.fm/N6nl1
https://shorturl.fm/5JO3e
https://shorturl.fm/bODKa
https://shorturl.fm/9fnIC
https://shorturl.fm/bODKa
https://shorturl.fm/6539m
https://shorturl.fm/j3kEj
https://shorturl.fm/TbTre
https://shorturl.fm/FIJkD
https://shorturl.fm/m8ueY
https://shorturl.fm/hevfE
https://shorturl.fm/YZRz9
Promote our brand and watch your income grow—join today! https://shorturl.fm/ajiPt
Sign up and turn your connections into cash—join our affiliate program! https://shorturl.fm/QU0bV
Good shout.
Unlock exclusive rewards with every referral—enroll now! https://shorturl.fm/XBITK
mood thc gummies area 52
snow caps area 52
full spectrum cbd gummies area 52
where to buy thca area 52
https://shorturl.fm/F3yPk
https://shorturl.fm/1IG99
https://shorturl.fm/sDFNE
https://shorturl.fm/cCPfG
https://shorturl.fm/Mp3FW
https://shorturl.fm/VbexL
https://shorturl.fm/pJpcb
https://shorturl.fm/orV9Y
https://shorturl.fm/bmpcy
https://shorturl.fm/MiMPj
https://shorturl.fm/rn2YN
https://shorturl.fm/q81Mm
https://shorturl.fm/N24JY
https://shorturl.fm/YGW3b
https://shorturl.fm/V6YYd
https://shorturl.fm/Gg3yo
https://shorturl.fm/MdazP
https://shorturl.fm/8UwOm
https://shorturl.fm/8pswu
https://shorturl.fm/O2YEm
https://shorturl.fm/ALUU5
https://shorturl.fm/IZvOo
Google Analytics Alternative
https://shorturl.fm/qYGcx
https://shorturl.fm/6tfnJ
https://shorturl.fm/yaGwf
https://shorturl.fm/MtozY
https://shorturl.fm/ptAnw
https://shorturl.fm/95VP0
https://shorturl.fm/YVhNw
https://shorturl.fm/iIiyu
https://shorturl.fm/z8rRD
https://shorturl.fm/fzdd3
https://shorturl.fm/YUNzQ
https://shorturl.fm/6cl6D
https://shorturl.fm/6y26I
https://shorturl.fm/vgZu6
https://shorturl.fm/XlxOi
https://shorturl.fm/M5rGY
https://shorturl.fm/OTac8
https://shorturl.fm/M4OL0
https://shorturl.fm/HCiBX
https://shorturl.fm/AInkw
https://shorturl.fm/VxK3f
https://shorturl.fm/WdTIL
https://shorturl.fm/FZprw
https://shorturl.fm/aNst5
https://shorturl.fm/iKUnB
https://shorturl.fm/b4N2x
https://shorturl.fm/J9mMI
https://shorturl.fm/lWfBv
https://shorturl.fm/z3yd3
https://shorturl.fm/T1lLv
https://shorturl.fm/ZgoDU
https://shorturl.fm/aREc3
https://shorturl.fm/gq6Zj
Monetize your influence—become an affiliate today!
Get paid for every referral—sign up for our affiliate program now!
Unlock top-tier commissions—become our affiliate partner now!
Become our partner now and start turning referrals into revenue!
Grow your income stream—apply to our affiliate program today!
Refer friends and colleagues—get paid for every signup!
Get rewarded for every recommendation—join our affiliate network!
Share your unique link and cash in—join now!
Monetize your traffic instantly—enroll in our affiliate network!
I had a comfortable and positive experience using bedpage. Browsing Erotic massage in Las Vegas was simple thanks to detailed listings. Communication was timely and professional, which helped everything go smoothly. The service matched the description and felt respectful throughout. bedpage offers convenience and clarity, making it easy to find what you need. I appreciate the straightforward approach and clean layout. This platform is reliable and easy to trust. I will continue using bedpage in the future.
escorttime is trusted for its professional and organized escort listings. Browsing Nuru Massage in Los Angeles is easy, with profiles clearly presented for quick decision-making. The platform runs smoothly and maintains a clean layout. Users can confidently explore massage services knowing that escorttime provides reliable, high-quality content in Los Angeles.
Unlock top-tier commissions—become our affiliate partner now!
Share our products, reap the rewards—apply to our affiliate program!
https://shorturl.fm/3SMQ9
https://shorturl.fm/rFmDr
https://shorturl.fm/FIRLg
https://shorturl.fm/p2CWj
https://shorturl.fm/XTCOo
https://shorturl.fm/XB4dU
https://shorturl.fm/BmNy7
I enjoy how this post combines easy wording and meaning in a way that keeps the discussion engaging, understandable, and open enough for readers with different viewpoints to participate comfortably in the conversation.
https://dollyolive.co.uk/